Tethered Photography on Linux with Entangle
I had the positive FOSS experience of thinking of a toolset I desired and finding something workable. Not perfect, but workable. There was scant documentation for Entangle for tethered shooting on Linux is virtually non-existent. These are some quick notes from my first time setup & usage. Hopefully, this helps anyone else who finds themself in the position I was tonight.
A note for reading. A word wrapped in {} indicates a variable. Any commands found below would not have the curly brackets, but instead be whatever that should represent, be that a number or an extension name.
Prerequisites
- A compatible camera
- A USB cable to connect from your camera to your device.
- Check for settings you may need to disable for a better experience. In my case, I discovered through reading documentation on the Canon tethering utility available for Windows and Mac that it's recommended to disable the auto-screen off features. Powering the device down. Plugging in the cables from camera to PC, and then powering the device on.
Installing Entangle
I went to my operating system's software center and installed. It is available via Flathub
source code available on gitlab
Using Entangle
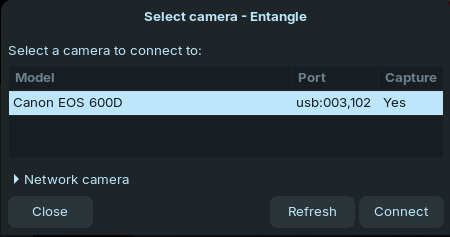
Connecting Your Camera
- Select the hamburger menu in the top right of the application.

Select the Connect... option
If your device is compatible, connected, and on, it should be present in the menu. Select that camera and connect.
Shortcuts
I discovered the following shortcuts by reading through Gitlab.
s - Trigger the shutter, to shoot a picture
p - Toggle live view preview mode
esc - Cancel the current operation
m - Toggle aspect ratio image mask
h - Toggle linear / logarithmic histogram
a - Drive autofocus during preview
, or . - Drive manual focus during preview (fine control)
< or > - Drive manual focus during preview (coarse control)
Settings
By default there are only a handful of settings present in the Camera settings menu; however, you can enable more. There is a gear icon on the left-hand side above the image histogram. For example, if your lens supports it, you could enable auto focus mode.
Live View
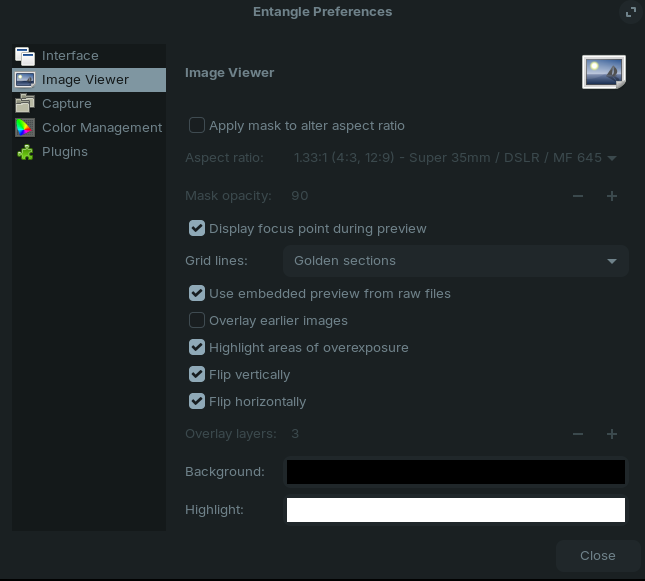
Entangle supports a live view. In the top left of the application, there is an image icon. Selecting this will present a live view of the subject. You can adjust your live view settings by navigating to the hamburger menu and selecting Preferences. From there, navigate to the Image Viewer. Within this menu, you can select whether you want the focus point present during preview, work multiple exposures and, and adjust the aspect ratios.
Saving Files
Files are set up into sessions. If you go to the preferences and click Session it will bring up your file browser. The default path appears to be ~/Capture/Pictures
From within the setting, you update the format of a camera capture. It defaults to captureXXXXXX.{extension} ex caputre000012.cr2.
Complications & Limitations
The program froze out on me a few times. I quickly got to work again by opening my terminal and running a ps aux | grep entangle to find the process ID and then ran a kill pid {ID}
I found that I didn't have all the control over my camera settings I desired through the computer, but I had enough to get results that worked for my purposes.